
KINGSTON, R.I. — September 21, 2021 — The Good Five Cent Cigar has covered protests at the University of Rhode Island and in Washington, D.C, controversies involving professors and students, building grand openings and closings for environmental and health reasons, untimely deaths of students and faculty, research and discovery, the victories, losses and personalities of University of Rhode Island sports teams, and, during the last 17 months, a global pandemic.
URI alumni, students, and faculty will celebrate and remember all of that and more during a virtual panel discussion with some of the founders of the student newspaper on Wednesday, Sept. 22, from 6 to 7 p.m. and in-person celebration during Alumni and Family Weekend on Saturday, Oct. 2, from 4 to 6 p.m. on the Alumni Center lawn. Registration deadline is Wednesday, Sept. 22 for the virtual panel and Monday, Sept. 27 for the in-person celebration at the Alumni Center.
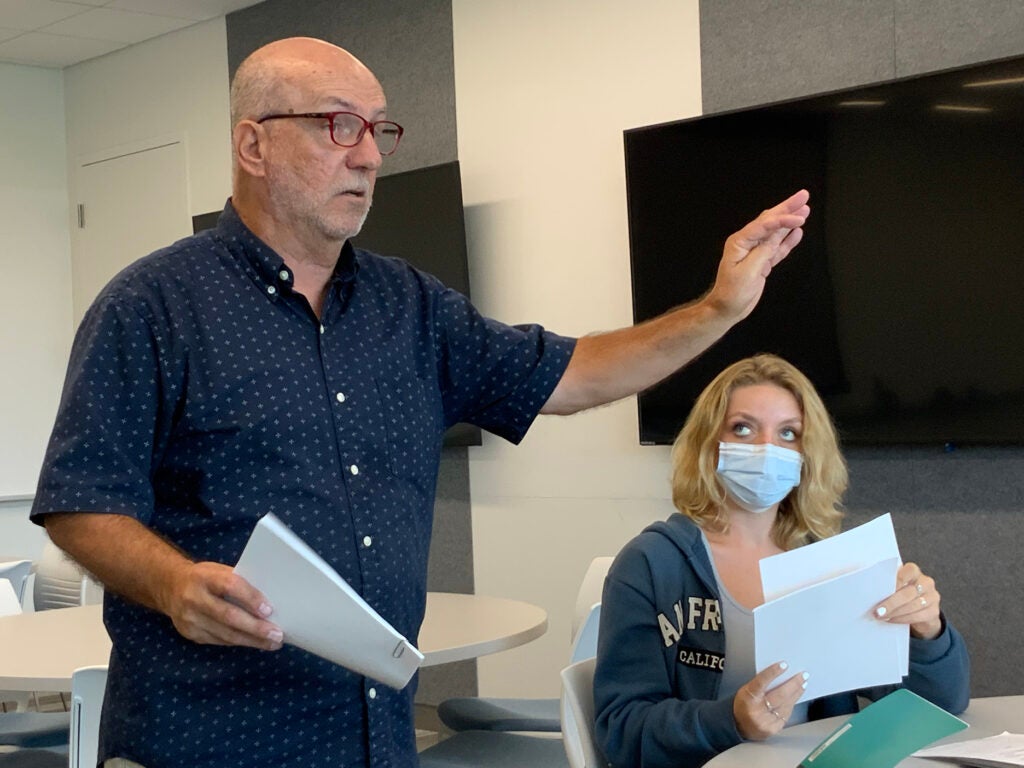
FIRST EDITOR-IN-CHIEF: John Pantalone, teaches the class Foundations of American Journalism. He is now associate professor and chair of the URI Department of Journalism. URI photo by Dave Lavallee
The demise of the former student paper, The Beacon, occurred in the spring semester of 1971, after a series of decisions by the editor led to several editors and reporters quitting.
“People wanted to cover certain issues, and the editor kept saying ‘no,’” said John Pantalone, ‘71, current chair of the URI Department of Journalism and the first editor-in-chief of The Cigar. “He didn’t seem to want to get on the administration’s bad side.”
The last straw was a decision to remove the name of a student from a story who discharged a firearm in a residence hall.
Several editors and reporters left the Beacon and on March 3, 1971, they published the first edition of The Cigar. The name was chosen by founding member Rich Rader, an homage to a quote by Thomas Marshall, a governor of Indiana and U.S. Senator. The Cigar Band, as the staff called itself then, believed the quote — “What the country needs is a good 5-cent cigar” — was a clever, verbal barb directed at the establishment and URI as an institution.
The first editor-in-chief
“It was a totally different campus atmosphere in 1971 than it was in the early to mid-1960s,” Pantalone noted, adding that the protests against the Vietnam War, and accompanying protests related to civil rights and Black Power and women’s rights all became very much a part of campus life across the country.
“We did stories about the dearth of Black students on campus and the takeover of the Carlotti Administration Building by Black students later that semester,” he said.
Pantalone also went to Washington, D.C., with other URI students for the anti-war student protest, and he was one of thousands arrested, and dragged into police vans.
“I had my pad, camera and credentials, but the police said everyone goes. So I spent a full day in a cell with a dozen people I didn’t know.”
Pantalone was released and told to return for a hearing. When he did, he and many others were released by the judge who said there was no evidence that they had committed a crime.
Beyond the big stories, Pantalone said he and his fellow editors and reporters learned some new things about managing people.
“I had never run anything, and I learned that the job wasn’t just about my editing skills. I learned how to talk with someone who missed a deadline by half an hour.”
Moving up the ranks
Bill Loveless ‘73, who worked for The Pawtucket Times after he graduated and then as an energy journalist for McGraw Hill in Washington, D.C., for 30 years, said those who worked at The Cigar could move up the ranks quickly. He was a sophomore during that tumultuous first semester who became a news editor in his junior year and then executive editor in his senior year.
“You are a part of a small group who does it because they enjoy it,” said Loveless, now director of the Energy Journalism Initiative and co-host of a podcast at Columbia University. “We developed a special camaraderie. We worked hard, we worked late and haphazardly at times, but mostly together.
“Our work on The Cigar became our laboratory, it’s where we learned to report hands-on. We covered all these events, and I realize that so much of my education really came out of the stories I covered for The Good Five Cent Cigar.”
Once he left URI, Loveless hired plenty of reporters. “If they had become interested in journalism when they were in college, I always asked them if they worked at the school paper. If they said ‘no’ then I questioned that.”
Equal partners
Another original member, Lucia Droby, who worked for an alternative newspaper in Georgia after graduating from URI in 1971 and who later spent several years as a videographer for Channel 7 news in Boston, now coordinates several community events in Wiscasset, Maine.
“At the Cigar, we had a whole new way of doing business,” Droby said. “There was no hierarchy. Instead we worked as colleagues in a collaborative environment. It was life-changing, because typically you’d spent a lot of your life doing what you were told. When I was on The Beacon, whatever I was assigned I would have done, and whatever role was expected of me that’s what I would have done. Being respected, being invited to participate in the paper at all levels, in all editorial decision-making, that was transformative.
“Also there were quite a few women working on the staff, and they were equal partners. In fact, the women stand out as the front line in terms of staffing the paper from the bottom up.”
And women continue to have great influence at The Cigar today. Of the 20 staffers listed on the masthead in fall of 2020, 13 were women. This semester, 22 of those listed on the masthead, 14 are women, including the editor-in-chief and managing editor.
Today’s editor-in chief
Senior Kate LeBlanc is in her second and final semester as the top editor of the paper. She said it is surreal that her adviser and mentor, Journalism chair Pantalone, was the first editor of The Cigar. She’s also taken three journalism courses with Pantalone.
“It has been very special because he has been such a great teacher and mentor,” said LeBlanc, who is from Oxford, Massachusetts. “It’s nice to work with someone who has such extensive experience as a journalist and professor. It’s really special for the whole staff to work with Professor Pantalone.”
She echoed her predecessors from 50 years ago, saying that working for The Cigar is the best practice for journalists, whether they are interested in print, broadcast or the web.
Like Loveless, she said “reporting on issues and events and writing about them are among the best ways to learn,” LeBlanc said. “You learn how to talk to anyone, and you also learn that everyone has a story.”
Her words about learning how to work with staff members as an editor are reminiscent of Pantalone’s feelings about the job five decades ago.
Being a member of The Cigar team has “been so much fun, but at the same time, being the editor comes with so much responsibility. You have to manage your reporters and staff, and it can be a lot. You want to be liked and respected, and you have to spend a lot of time with the editors. But as the editor-in-chief, sometimes you have to put your foot down.
“But once you spend two years with them, especially on Wednesday nights (when the paper is produced), from 5 p.m. to 3 a.m., in the hot, stuffy, Cigar office, you realize you are kind of stuck with them. I love them.”